Desserts · Paleo

Grain-Free Banana Chocolate Chip Cookies

I haven’t posted in quite a while, but I finally decided to share a recipe!

Although I have given up much of my baking, I have found ways to still make a few treats. The recipe I am posting today is one of my favorite grain-free cookie recipes (yep, I have several!). Some of the ingredients might sound a little weird…coconut palm sugar, coconut oil, and coconut flour. Coconut flour is pretty easy to find, at least where I live. There are lots of brands, even Bob’s Red Mill makes it, and you can even find it in bulk in larger grocery stores. The coconut palm sugar could be replaced with regular granulated sugar or raw sugar if you prefer. Raw sugar doesn’t dissolve as easily though, so the texture of the baked cookie is a little bit different, but totally fine in my opinion.

If you have access to a Costco, I highly suggest buying the organic coconut oil there, as it is incredibly inexpensive in the huge 78oz tub. Coconut oil does have a coconut flavor, which I am not totally crazy about. For baked goods it’s great; but for stir-fry or roasting veggies, not so much. I think it has a place in my diet, but it’s not the exclusive oil in my kitchen.

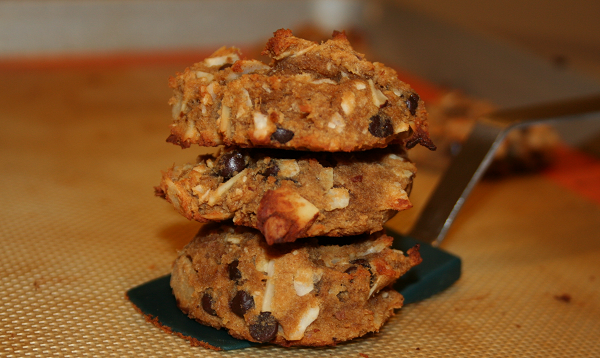
These cookies are soft and have a great banana-chocolate flavor that I think most kids will really enjoy. And since bananas are naturally so sweet, they have very little added sugar. In fact I think you probably could exclude it all together if you are really watching your sugar intake.

Paleo Banana Chocolate Chip Cookies

Grain-Free Banana Chocolate Chip Cookies

  • 2 small very ripe bananas (speckled peel, but not all brown and mushy)
  • 1 egg
  • 1/4 cup coconut palm sugar
  • 2 tablespoons coconut oil, melted (measured, then melted)
  • 1 tablespoon vanilla extract
  • 1/4 cup coconut flour (rounded, not leveled)
  • 1/4 cup shredded, unsweetened coconut
  • 1/4 cup sliced almonds, optional
  • 1/4 cup chocolate chips (we use the mini Enjoy Life)
  • 1 teaspoon baking powder
  • dash salt
  • dash cinnamon
  1. Preheat oven to 325.
  2. In the bowl of a stand mixer, beat the bananas until fairly smooth. Add egg and vanilla and blend until incorporated. Add the remaining ingredients and continue to mix until well combined, mixture will not look like typical cookie dough, it’s much stickier and thinner.
  3. Using a tablespoon (I use the one I measured the coconut oil with) drop the dough onto a silpat or parchment lined baking sheet. Press gently with fingertips to flatten. Bake for 20-25 minutes or until lightly browned and set. Allow to cool several minutes before removing to a wire rack to cool completely.


Desserts · Paleo

Flourless Brownie Bites


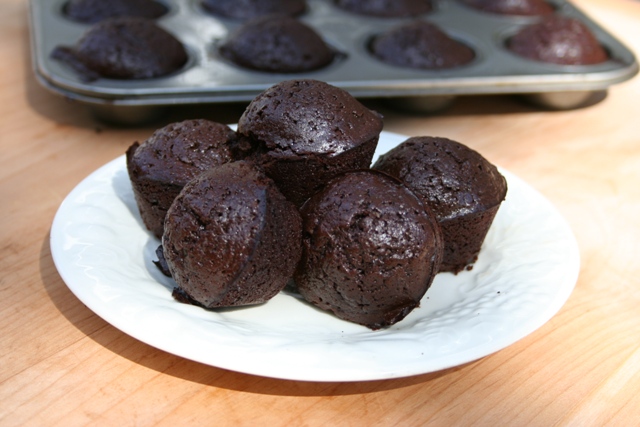
We’ve been eating Paleo lately. I know eating grain-free would seem to imply that desserts, like brownies, would be impossible. But where there is a will, there is a way. And here, my friends, are some Paleo Brownie Bites. And with no alternative flours, they have no alternative flavors. Just bite-sized pieces of brownie goodness. I have made several batches now and they never last more than 24 hours. That’s like a brownie bite an hour, but who’s counting?

Don’t let the whole “Paleo” thing scare you. They are simply flourless brownies. Truly flourless brownies, with no nut flour, coconut flour, etc. Not even a gum in sight.

I guess the only “weird” ingredient is coconut palm sugar, but if you are trying to eat healthier, you probably are already familiar with this ingredient. If not, you could replace it with regular, granulated sugar. But, honestly, coconut palm sugar isn’t refined and actually has some nutritional value (unlike refined granulated sugar we are typically baking with), so it might be worth looking into. It is expensive, but it’s sugar, so you aren’t supposed to be using it that often anyway. Right?! I have to remind myself of this. My new mantra should be something like this, “Sugar and chocolate are occasional treats…sugar and chocolate are occasional treats.”

I have used regular raw sugar in this recipe, and it works fine, too. However, it doesn’t melt into baked goods nearly as well as coconut palm sugar, so you get a bit of the grainy texture.

Honestly, these are so much better than the first few batches of gluten-free brownies I made. Had I known grain-free baking could taste so good, I wouldn’t have been so eager to fill my cupboards and fridge with all those spendy alternative flours. Live and learn I guess. And these brownies bites are so easy to make, even an older child should be able to whip up a batch. And I am betting they won’t last long at your house either.

It’s easy to complain about dietary restrictions, but as long as I can still enjoy the occassional chocolate dessert, I guess I really can’t complain too much.

Happy gluten-free or grain-free baking!


paleo brownie bites 1

Flourless Brownie Bites

I measure the coconut oil after it is melted and grease the pans with any excess (a paper towel or silicone pastry brush works well).

If you can eat tree nuts, I think 1/4 cup or so of chopped walnuts or pecans would be a nice addition.

Dry Ingredients:

  • 1 cup baking cocoa
  • 1 cup coconut palm sugar
  • 1 tablespoon instant espresso powder
  • dash salt
  • dash cinnamon
  • 1/4 cup mini chocolate chips (we use Enjoy Life brand), optional

Wet ingredients:

  • 4 eggs
  • 1/3 cup melted coconut oil
  • 1 tablespoon vanilla extract
  • 1 tablespoon honey


Directions:

  1. Preheat oven to 350. Grease mini muffin tins (I make 24 mini muffins, using 2 12-muffin trays) with coconut oil.
  2. In a large bowl, combine the dry ingredients and mix with a wooden spoon. Add the wet ingredients and stir until well combined. Divide dough among the muffin trays, using approximately 1 tablespoon of batter per muffin space. Bake in preheated oven for 10-12 minutes or until a toothpick inserted in the center comes out with only a few moist crumbs. 
  3. Remove from oven and allow to cool in pans for 5-10 minutes. Using a small plastic spatula or plastic knife gently go around the outside rim of the muffin, to remove it from the tin (alternately you could use paper muffin liners for easier removal). Allow to cool completely on a wire rack.
Paleo · quick and easy · Snacks

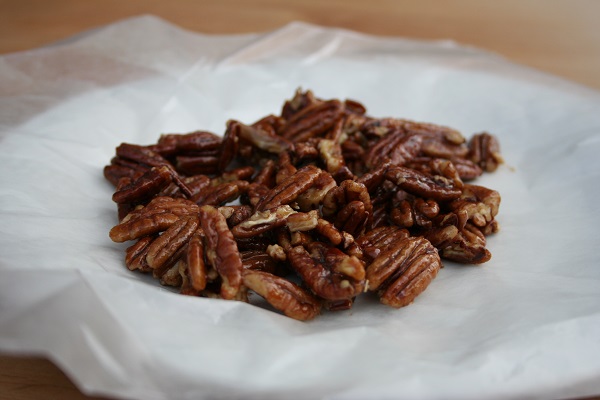
Easy Maple Syrup Candied Pecans (or walnuts)


Okay, so I originally came up with this recipe out of necessity. Well, maybe that sounds a bit extreme. But I was making a Spinach & Strawberry Salad and really wanted candied pecans to go with it. The problem was, we had just started eating a Paleo style diet that week and brown sugar and corn syrup aren’t exactly part of the new plan.

Being the problem solver that I am, I decided to get creative and came up with this super simple, and super delicious stove top version of candied pecans. I opted for maple syrup because I love the flavor and being already liquid, it is easy to coat the pecans quickly. No waiting around for sugar to melt and all that nonsense. The stove top version is really quick and easy, but they are a bit sticky, if you prefer a more crunchy version, you could toss them in preheated oven (probably around 200) for 5-10 minutes just to toast them a bit more.

I highly recommend making small batches of these, because they’re pretty addictive.  I’ve also made walnuts this way, and they are equally delicious.

Although I originally made this for a salad topping, they are pretty darn good as a snack. And I would imagine they would make a great ice cream or pie topping. Can you imagine a handful of these guys on the top of a homemade sweet potato pie or pudding? Now, that would be delicious.

Candied Pecans

Easy Maple Syrup Candied Nuts:

You could add some vanilla, cinnamon, or even some heat (like cayenne) to get some really great flavors here.

  • 1 cup pecans or walnuts (pieces or halves)
  • 2 tablespoons pure maple syrup
  1. Place a piece of parchment or waxed paper on a plate.
  2. Combine the nuts and maple syrup in a small saute pan. Heat over medium heat, stirring almost constantly, for about 3 minutes, or until the sauce is bubbly and the nuts are well coated.
  3. Remove from heat and place on parchment  to cool. Enjoy.
Paleo · Salads

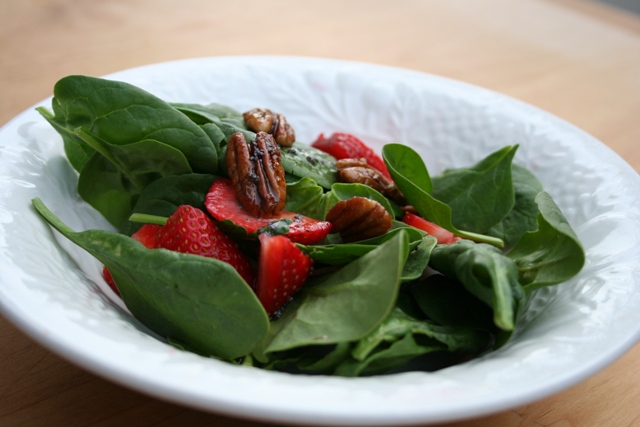
Strawberry & Spinach Salad


We’ve had a nice break from the rain here in the Northwest and the local strawberries are already arriving at the produce stands! I usually have to wait another month or so to enjoy fresh, local berries, but I am not complaining about their early appearance this year.

I am not typically the type to combine fruit and vegetables into a toss salad, but we are eating a lot of produce lately, and I wanted to try something new.

This salad is so simple and so delicious. Much to my surprise my whole family really enjoyed the strawberry and spinach combination; however, my kindergartner did not care for the dressing. She’s not much of a poppy seed fan.

This salad is not only great tasting, but I think it’s really pretty, too! Although we enjoy it for an easy weeknight salad, it would also be perfect for a Spring brunch, Mother’s Day, or a shower.

The candied nuts are really optional, and obviously a less healthy choice than just using some lightly toasted nuts.  However, they are super easy to make and taste amazing. I suggest only making a small batch though, as they are rather addictive. I posted them separately, as I think they are great on their own as sweet snack or dessert topping.

spinach & strawberry salad 2

Strawberry & Spinach Salad

Ingredients:

Dressing:

  • juice from half a lemon
  • 2 tablespoons honey
  • 1 tablespoon olive oil
  • 1 teaspoon poppyseeds


Directions:

  1. In a large bowl, combine the spinach, strawberries, and nuts. Toss to combine.
  2. For the dressing: in a small bowl or glass jar with a tight-fitting lid, combine the dressing ingredients and whisk together (or shake if using jar). Dress each salad portion right before serving.


Uncategorized

Trying to eat grain free

I’ve been procrastinating posting about our Paleo diet because I just didn’t know what to say. Today’s post won’t include a recipe, but don’t fret, tomorrow’s post will! Here is the short version of a very long story.

My husband’s health has been rapidly deteriorating over the last few years and he’s been diagnosed with half a dozen autoimmune disorders/conditions. On top of all of that, he is having issues with neuropathy; and with low vitamin levels and osteopenia, one of his neurologists believes that the cause is most likely malnutrition. Obviously not because he is not eating, but because he is not absorbing the nutrients from the food. The neurologist suggested that he try a dairy-free and grain-free diet for three months to see if it might help.

The elimination of dairy is not a new suggestion; we’ve known that many scientist and physicians do believe dairy can be inflammatory. The grain-free thing just sounds wacky to me. Seriously, no grains?

Well, turns out there are several reasons for this one. First, eating gluten-free grains doesn’t always mean truly gluten-free. Several of the well-marketed gluten-free companies don’t even test for gluten. Yep. How nice is that to find out? And then there is the “tested to be less than 20 ppm” claim. Okay, but what if you are using a lot of their products? It’s quite possible that you might be getting quite a bit of gluten.

Also, there is some research (especially in other countries) that suggest grains may cause an autoimmune response in some individuals.

Ultimately, my husband has decided to follow his neurologist’s suggestion and attempt to eat completely grain-free and dairy-free. Basically, we are following a Paleo diet. However, I don’t necessarily believe all grains are horrible for you; he is having serious health issues and we are doing this Paleo experiment out of desperation. I have no agenda. I am not trying to convert gluten-free readers to eat a more restrictive diet. I am simply going to blog our experience trying to adapt to a grain-free diet. We are going to give it three months and then assess the situation.

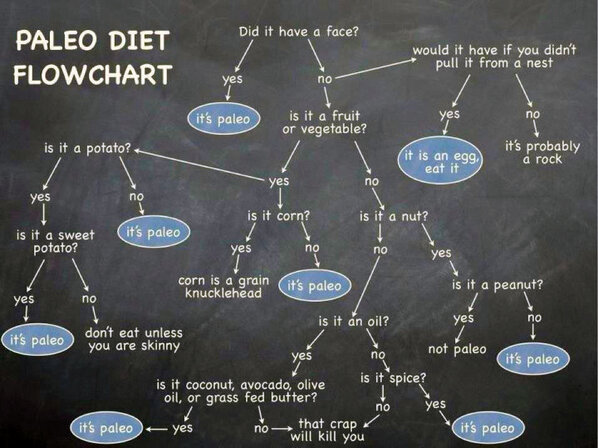
I know the term Paleo Diet means different things to different authors, bloggers, and scientists. I am using the term to refer to a diet based on meat, fish, fruits, vegetables, healthy oils, and nuts & seeds. No grains, beans, or legumes.  Yep, technically that includes peanuts. No potatoes or processed foods, including vegetable oils and refined sugars.

Some versions of the diet eliminate things like sweet potatoes, sugars, or salt, but we aren’t going that far. I am using raw sugar, maple syrup and honey for sweeteners. And my husband has Addison’s Disease, so a salt-restrictive diet is not advisable. We still eat the beans, like green beans, that are more pod than bean. Basically, I am not a Paleo purist (whatever that might be). I am just doing what makes sense for our situation.

We’ve been eating this way for about 2 weeks now and it’s been quite an adjustment. It’s been frustrating. It’s been expensive. And it’s been enlightening.

We aren’t starving, in fact we’ve enjoyed some really good meals. And tomorrow I’ll start sharing some recipes! It’s definitely not the gluten-free adventure I planned, but that’s life for you  🙂


Uncategorized

Paleo Recipes?

My husband was diagnosed with Celiac several years ago. I started this blog as a way to record my successful recipes and possibly help others looking for gluten-free recipes that actually taste good. I’ve always loved to cook and learn about food, so a food blog seemed like a great way to learn and share. I post a lot of dessert recipes, because frankly that is what we missed since going gluten-free.

But times change.

Over the last couple of years my husband has continued to have serious health issues and it appears that eating gluten-free (at least they way we are eating gf) is not working.  So at the recommendation of his physicians he is going to be eating following the Paleo Diet for the next three months. I am no expert on Paleo, but I’ll be learning lots I am sure. I do know it seems restrictive but it’s gluten-free!

This isn’t something I am really excited about, but you do what you gotta do, especially when it comes to your health. So ready or not Paleo here we come. My whole family will probably not be eating strictly Paleo, because my oldest daughter has tree nut and egg allergies, but we will be trying to eat as many meals together as possible because I hate cooking multiple meals.

This brings me to my question: Would you like me to blog my Paleo experience and recipes?

Please leave a comment and let me know your thoughts or suggestions.


Desserts

National Soyfoods Month


You probably already know that April means taxes, Earth Day and rain, but did you know that April is also National Soyfoods Month?

So now is the perfect time to learn about the place for soy in a healthy diet and easy ways to incorporate it into everyday meals. Packed with protein and fiber, soyfoods are a tasty way to reduce calories, saturated fat and maintain your weight.

We enjoy lots of soy products at my house. In fact we typically have soymilk, soy yogurt, and some tofu in the fridge on any given day.

When it comes to soymilk, I prefer to buy the plain organic, unsweetened variety, but my daughter loves the chocolate too.

Westsoy makes some great organic soymilks with only 1gram of sugar per serving! It’s the shelf-stable variety, so you’ll find it down the grocery aisle with the boxed milks.

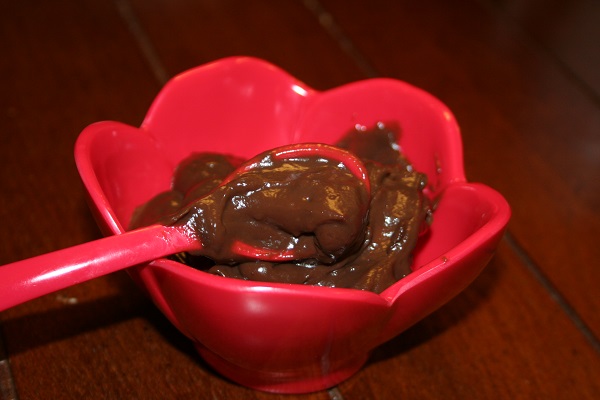
My 6 year old has really been missing chocolate pudding and I finally came up with a delicious soy version. It’s super easy and quick to make, so don’t worry if you’ve never made from-scratch pudding before. I added some creamy peanut butter on a whim and it tastes great. I am also thinking that omitting the peanut butter, but adding some espresso powder would be a delicious variation-Chocolate Espresso Soy pudding, yummy! So many options.

soy chocolate pudding

Chocolate Peanut Butter Soy Pudding

If you want plain chocolate pudding, just leave out the peanut butter.

  • 1/3 cup unsweetened cocoa
  • 3/4 cup granulated sugar
  • dash salt
  • 1/4 cup cornstarch
  • 3 cups unsweetened chocolate Westsoy soymilk
  • 1 tablespoon butter or dairy-free substitute
  • 1 teaspoon vanilla extract
  • 1 tablespoon cream peanut butter
  1. In a large saucepan, whisk together the cocoa, sugar, salt, and cornstarch. Slowly stir in the soymilk. Bring to a boil, stirring constantly. Reduce heat to medium-low and continue to cook, stirring constantly, until thickened, 5-7 minutes. Remove from heat and stir in butter, vanilla, and peanut. Allow to cool before serving. Can be served warm or chilled.


This sponsorship is brought to you by the Soyfoods Association who we have partnered with for this promotion. The Soyfoods Association of North America (SANA) provides information about the health benefits and nutritional advantages of soy. SANA offers fun recipes and convenient ways to incorporate soy into meals for everyone – from athletes to families. SANA is dedicated to spreading the word about soy, especially during National Soyfoods Month in April!

Follow the SoyFoods Association on Twitter at @SocialSANA

SoyFoods Association on Facebook

Desserts

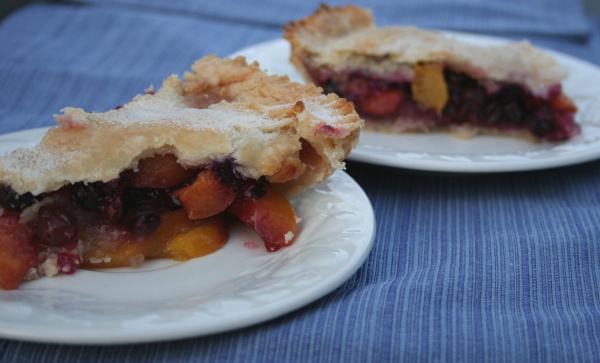
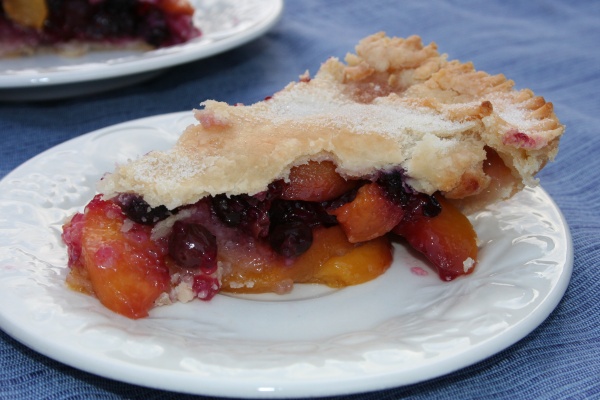
Peach Blueberry Pie

Peach Blueberry Pie Directions:

You want about 7 cups of fruit. I listed the measurements I used, but you could use more of less peaches (or all peaches) if you prefer.

  1. Heat oven to 425.
  2. In a large bowl combine the fruit, sugar, tapioca, cornstarch, lemon juice, and cinnamon. Allow to set 15 minutes, stirring occasionally. Meanwhile,  on a well- floured (use gf flour blend or cornstarch) roll out the bottom crust for the pie and place in the pie pan. Spoon the fruit mixture into the crust-lined pan; if there is a lot of juice left in the bowl, just throw it out (a couple tablespoons is fine, but you don’t want a watery pie). Refrigerate while you prepare the top crust. Gently place the top crust over the fruit and flute edges or crimp with a fork.
  3. Bake pie in preheated oven for 20 minutes. Remove from oven and brush with milk (I used flax milk) or beaten egg. Sprinkle generously with granulated sugar and cover edges with strips of foil to prevent over browning. Return to oven and cook an additional 20-30 minutes or until golden brown.
  4. Allow to cool 2 hours (you can cut into it while warm, but it will be slightly runny).

Peach & Blueberry pie 3

Yesterday was March 14, or 3/14, or 3.14, making it Pi Day. If you were the one sleeping in the back of class during math period you may have no idea what is going on here, but just stay with me. It all ends with pie.

I had not intention of making a pie for Pi Day, because honestly I find the whole thing kind of absurd. But everywhere where I went Pi, Pi, Pi. It finally got to me and I just had to make pie. I am guessing the founders of Pi Day wanted to inspire me to do math, but baking involves math, so I guess it’s a win-win situation.

I have never made a peach blueberry pie before, but I really wanted a fruit pie and being March in the Pacific Northwest there aren’t a lot of fresh fruit options. And I didn’t want to go the store for apples. I only had 5 cups of frozen peaches so I threw in frozen blueberries to make the up remaining couple of cups. My family was a bit skeptical of my fruit combo, but it was a winner! We couldn’t even wait for it to cool completely to cut into it. Delicious.

Since I used frozen fruit, which tends to be very watery, I used plenty of tapioca and cornstarch. If you are using fresh fruit, you might want to reduce or eliminate the cornstarch. I hate a runny pie though, so I tend to error on the side of caution.

I know pie crust is one of the most dreaded of all baking projects. And yes, it does take a bit of patience, but you CAN make gluten-free pie crust, delicious, wonderful, flaky, gluten-free pie crust. My all-time favorite gluten-free crust recipe is this Butter Pie Crust. If you need this dessert to be dairy-free, my Allergy-Friendly Pie Crust works wonderfully; and it’s actually the crust pictured here.

Also, I think pies are prettier if they get an egg wash and some sugar on top. It browns nicer and has a little sparkle. Unfortunately my daughter has an egg allergy, so I used some flax milk and sugar. It worked perfectly fine. If you have some peach jelly you could use this too (just brush it on, no additional sugar needed). This is really just for looks, it’s not a necessary step.

Although apple is my go-to pie filling, I might have to reconsider, because this Peach and Blueberry Pie with frozen fruit is quite wonderful…and I you don’t even have to wait until summer.

I hope you have a wonderful weekend filled with great food. Happy gluten-free baking!


Desserts

Allergy Friendly Pie Crust

Allergy Friendly Pie Crust Directions:

If you don’t need this to be dairy-free, simply use butter in place of the shortening and butter substitute. I am guessing lard could be used as well.

  1. In a large bowl mix together the dry ingredients. Add the butter substitute and shortening and using your fingers, a fork,  or a pastry cutter/blender, blend until a coarse meal forms (I prefer using a pastry blender). Add the vinegar and stir with a fork or spoon. Add the water, 1 tablespoon at a time, until a dough forms that sticks together, but doesn’t feel wet (if you’ve never made pie before, it sort of feels like play dough or sugar cookie dough). The amount of water you use will vary depending on the humidity of your kitchen.
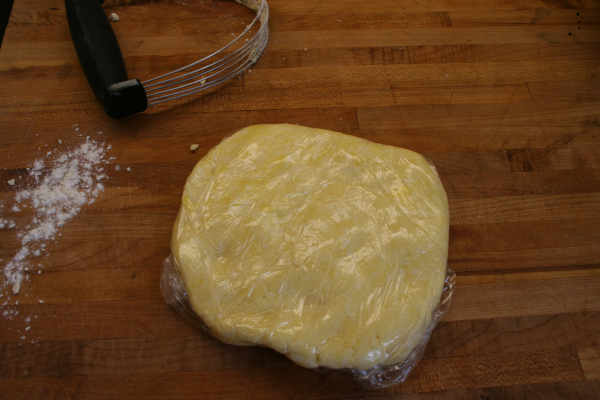
  2. Divide the dough in half and form into 2 balls, smash  each ball of dough into a disc with the palm of your hand and wrap each disc individually in plastic wrap. Refrigerate dough for about 20-30 minutes or until firm, but not hard (or they’ll have to set at room temperature a bit before they’ll roll nicely).
  3. If you have a silicone baking sheet or a piece of parchment, this makes a great rolling surface; if not a counter or cutting board will work. Generously flour or starch your surface and rolling pin. Remove one disc of dough from the refrigerator and unwrap, place on the prepared surface and sprinkle with additional flour or starch (you can place a piece of plastic wrap over the disc before rolling, this helps the rolling pin from sticking). Using the rolling pin, slowly and gently roll into an approximate 11 -inch circle ( Ideally you want a 1-inch overhang for crimping). If the dough breaks, just re-roll over the spots or press it together with your fingers. If it is breaking a lot, it might be too cold and just let it set at room temperature a few minutes and re-roll it.
  4. If you rolled the dough out on parchment or silicone mat, I would suggest simply picking it up and quickly flipping it into the pie plate. If it tears a bit you can press it together with your finger. Alternately, you can roll the dough around the rolling pin, pick up the rolling pin and gently set it over the pie plate. Slowly unroll the dough from the pin, placing it in the pie plate.
  5. Now you are ready to blind bake the crust or fill with your favorite pie filling.
  6. For a double crust pie, simply roll out the top crust, place over filling and crimp edges using fingers or a fork.
  7. Cooking time and temperatures will vary slightly depending on the type of pie you are making, but generally fruit pies bake for 40-60 minutes at around 400. *For a pretty top crust, brush with an egg wash and sprinkle with sugar halfway through the baking time.

pie crust 3


Call me crazy, but I love making pie. Really good pie. With homemade crust. No refrigerator stuff, no mixes, just the old fashioned from scratch variety.

I finally discovered a wonderful gluten-free Butter Pie Crust recipe that I posted and I still recommend. It is flaky, flavorful, and easy to work with. However, part of my family is now eating dairy-free, so I needed a new pie crust recipe. A reader commented that they used dairy-free cream cheese and it worked fine, but I didn’t have any in the fridge so I came up with an easier (and less expensive solution).

Today’s post is the best tasting, egg-free, dairy-free, gluten-free pie crust I have tried. It is a little hard to handle, but you can easily press the dough back together. It really does taste like a traditional pie crust. Of course, if you can eat butter, you could use butter in place of my shortening/butter substitute.

If you are anything like me, chances are you are going to be tempted to taste the dough raw. Well, don’t. The vinegar has a very pronounced flavor in the dough. Thankfully baking removes the acidic taste.

Don’t let food allergies and intolerances stop you from enjoying and making great food, including great pie. I know it takes more ingredients and more time than it does for most people, but sometimes you just need a piece of pie. I tried to include detailed instructions, so even if this is your first attempt at a pie crust, it shouldn’t be too difficult.

Happy Gluten-Free Baking!

Peach & Blueberry Pie 2


Desserts

Coconut Tapioca Pudding

Coconut Tapioca Pudding Directions:

This recipe calls for small pearl tapioca (I use this) not instant tapioca.

  1. Rinse tapioca thoroughly and drain in a fine mesh sieve.
  2. In medium saucepan, bring water to a boil and add tapioca. Cook over medium heat, stirring frequently, until translucent, about 10-12 minutes. Add coconut milk, sugar and salt. Reduce heat to low, stirring frequently, until pudding has thickened. Remove from heat and stir in vanilla if using. Allow to stand 15-20 minutes. Serve warm or chilled with sliced fruit and coconut if desired.


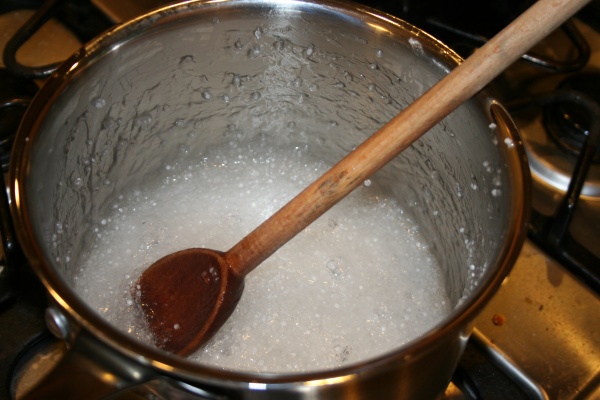
This is what the tapioca looks like when it has boiled in the water and becoming translucent.


coconut tapioca pudding 1

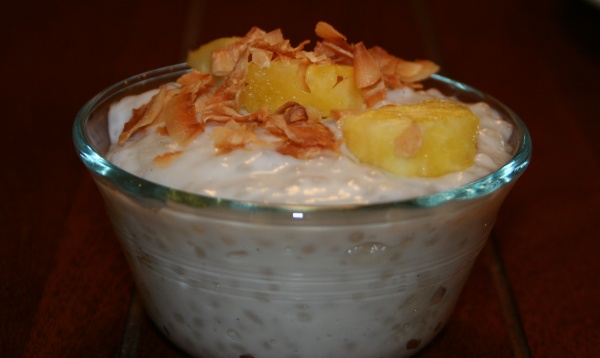
And the final pudding, ready to eat.

coconut tapioca pudding 2

I was flipping through one of my cookbooks and I spotted a recipe for Coconut Tapioca Pudding. It looked so good I bought all the ingredients, but when I actually went to make the  recipe it seemed unnecessarily complicated. I decided to make a much simpler version, based on a Thai Kitchen recipe.

The result is very sweet, sticky, Coconut Tapioca Pudding. Although it’s supposed to be sweet, if you are watching your sugar intake I think you could greatly reduce the sugar in this recipe without compromising flavor or texture.

This Coconut Tapioca Pudding is not only delicious and simple to make, but it also happens to be dairy and egg free as well (which is a rare thing to find in a tapioca pudding recipe).

We decided to top it with some fresh, chopped pineapple because I had some, but it would be equally good with diced mango. Toasting the coconut adds a nice nutty flavor and contrast in texture; and it’s really simple to make. Here are the directions if you’ve never toasted coconut.